Payment Integration
Payment Overview
Currently RavenSaaS supports Stripe web payment functionality. Other payment channels will be integrated gradually.
Configure Stripe Payment
1. Set up Stripe Merchant Account
Please ensure you have set up a Stripe merchant account before configuring Stripe payment in RavenSaaS.
2. Create Payment Keys
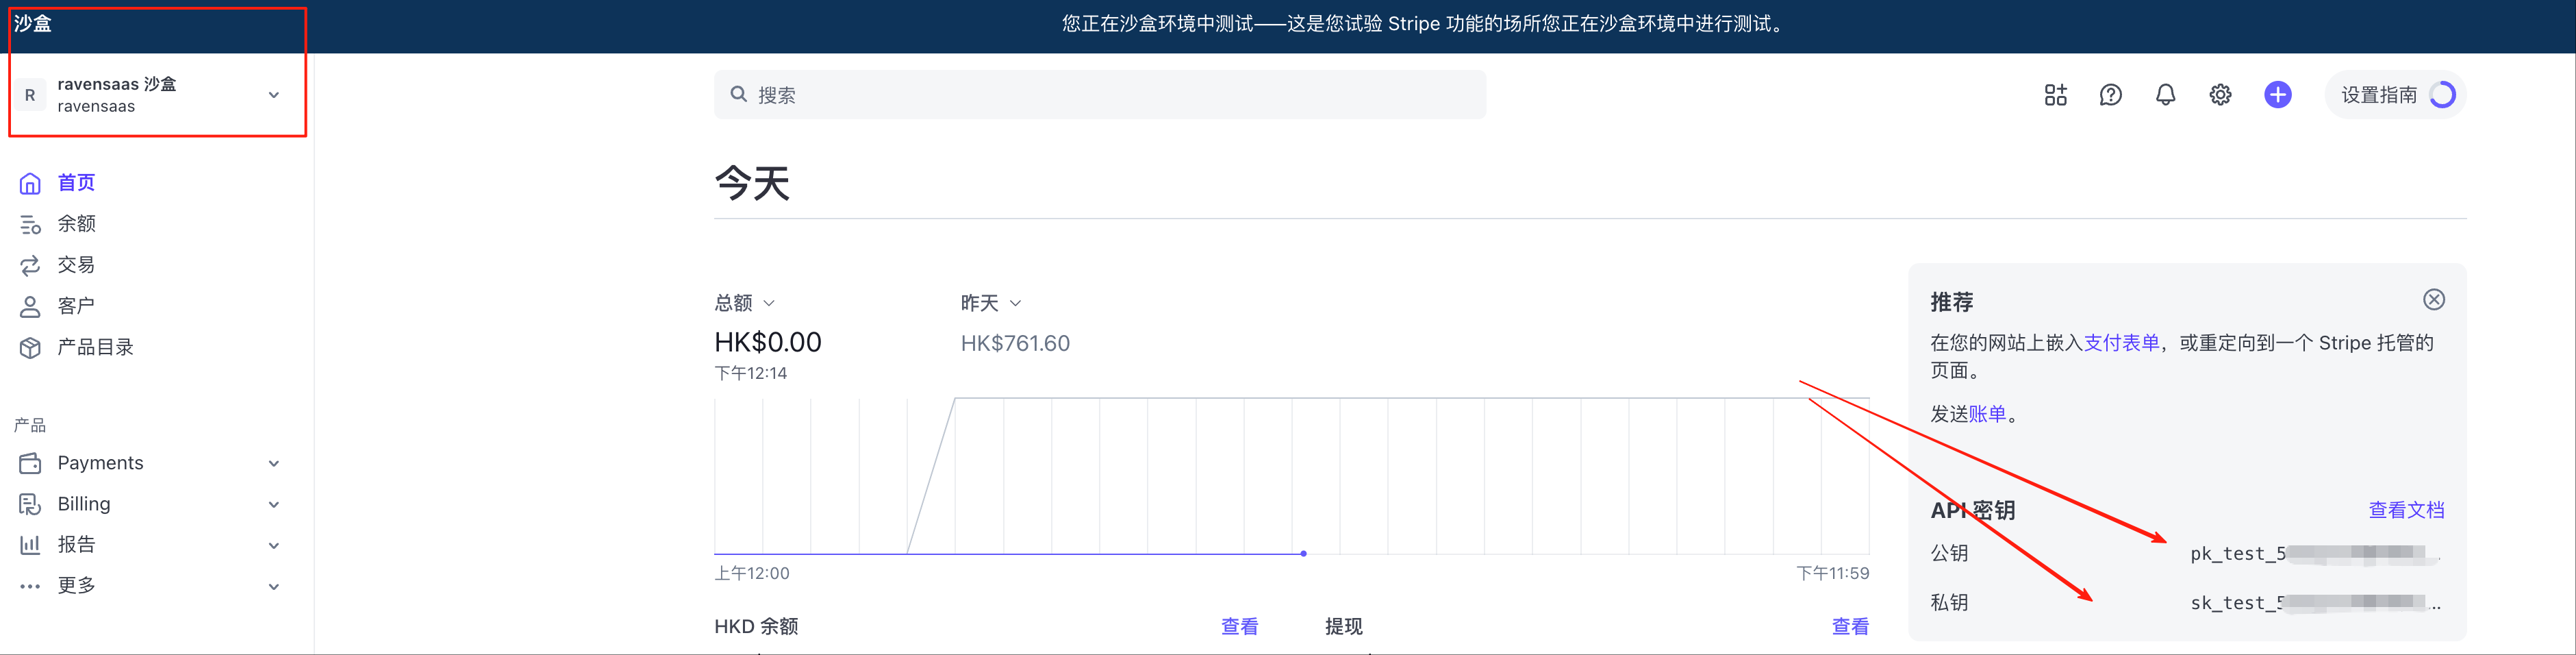
Create payment keys in the Stripe developer console.
For local debugging, you can choose to enter sandbox mode and get a pair of test keys.
3. Configure Environment Variables
Modify RavenSaaS project configuration to enable Stripe payment.
Configure environment variables and modify the callback addresses for payment success/failure/cancellation according to your project needs.
1#
2STRIPE_PUBLIC_KEY = "pk_test_xxx"
3STRIPE_PRIVATE_KEY = "sk_test_xxx"
4
5NEXT_PUBLIC_PAY_SUCCESS_URL = "http://localhost:3000/my-orders"
6NEXT_PUBLIC_PAY_FAIL_URL = "http://localhost:3000/#pricing"
7NEXT_PUBLIC_PAY_CANCEL_URL = "http://localhost:3000/#pricing"
4. Create Orders Table
Before creating the orders table, please ensure you have followed the steps in the Database chapter to configure database storage and connection information.
And execute SQL to create the users user information table.
Copy the data/install.sql orders orders table creation statement from the file and create the order information table in your database.
1CREATE TABLE orders (
2    id SERIAL PRIMARY KEY,
3    order_no VARCHAR(255) UNIQUE NOT NULL,
4    created_at timestamptz,
5    user_uuid VARCHAR(255) NOT NULL DEFAULT '',
6    user_email VARCHAR(255) NOT NULL DEFAULT '',
7    amount INT NOT NULL,
8    interval VARCHAR(50),
9    expired_at timestamptz,
10    status VARCHAR(50) NOT NULL,
11    stripe_session_id VARCHAR(255),
12    credits INT NOT NULL,
13    currency VARCHAR(50),
14    sub_id VARCHAR(255),
15    sub_interval_count int,
16    sub_cycle_anchor int,
17    sub_period_end int,
18    sub_period_start int,
19    sub_times int,
20    product_id VARCHAR(255),
21    product_name VARCHAR(255),
22    valid_months int,
23    order_detail TEXT,
24    paid_at timestamptz,
25    paid_email VARCHAR(255),
26    paid_detail TEXT
27);
5. Configure Pricing Table
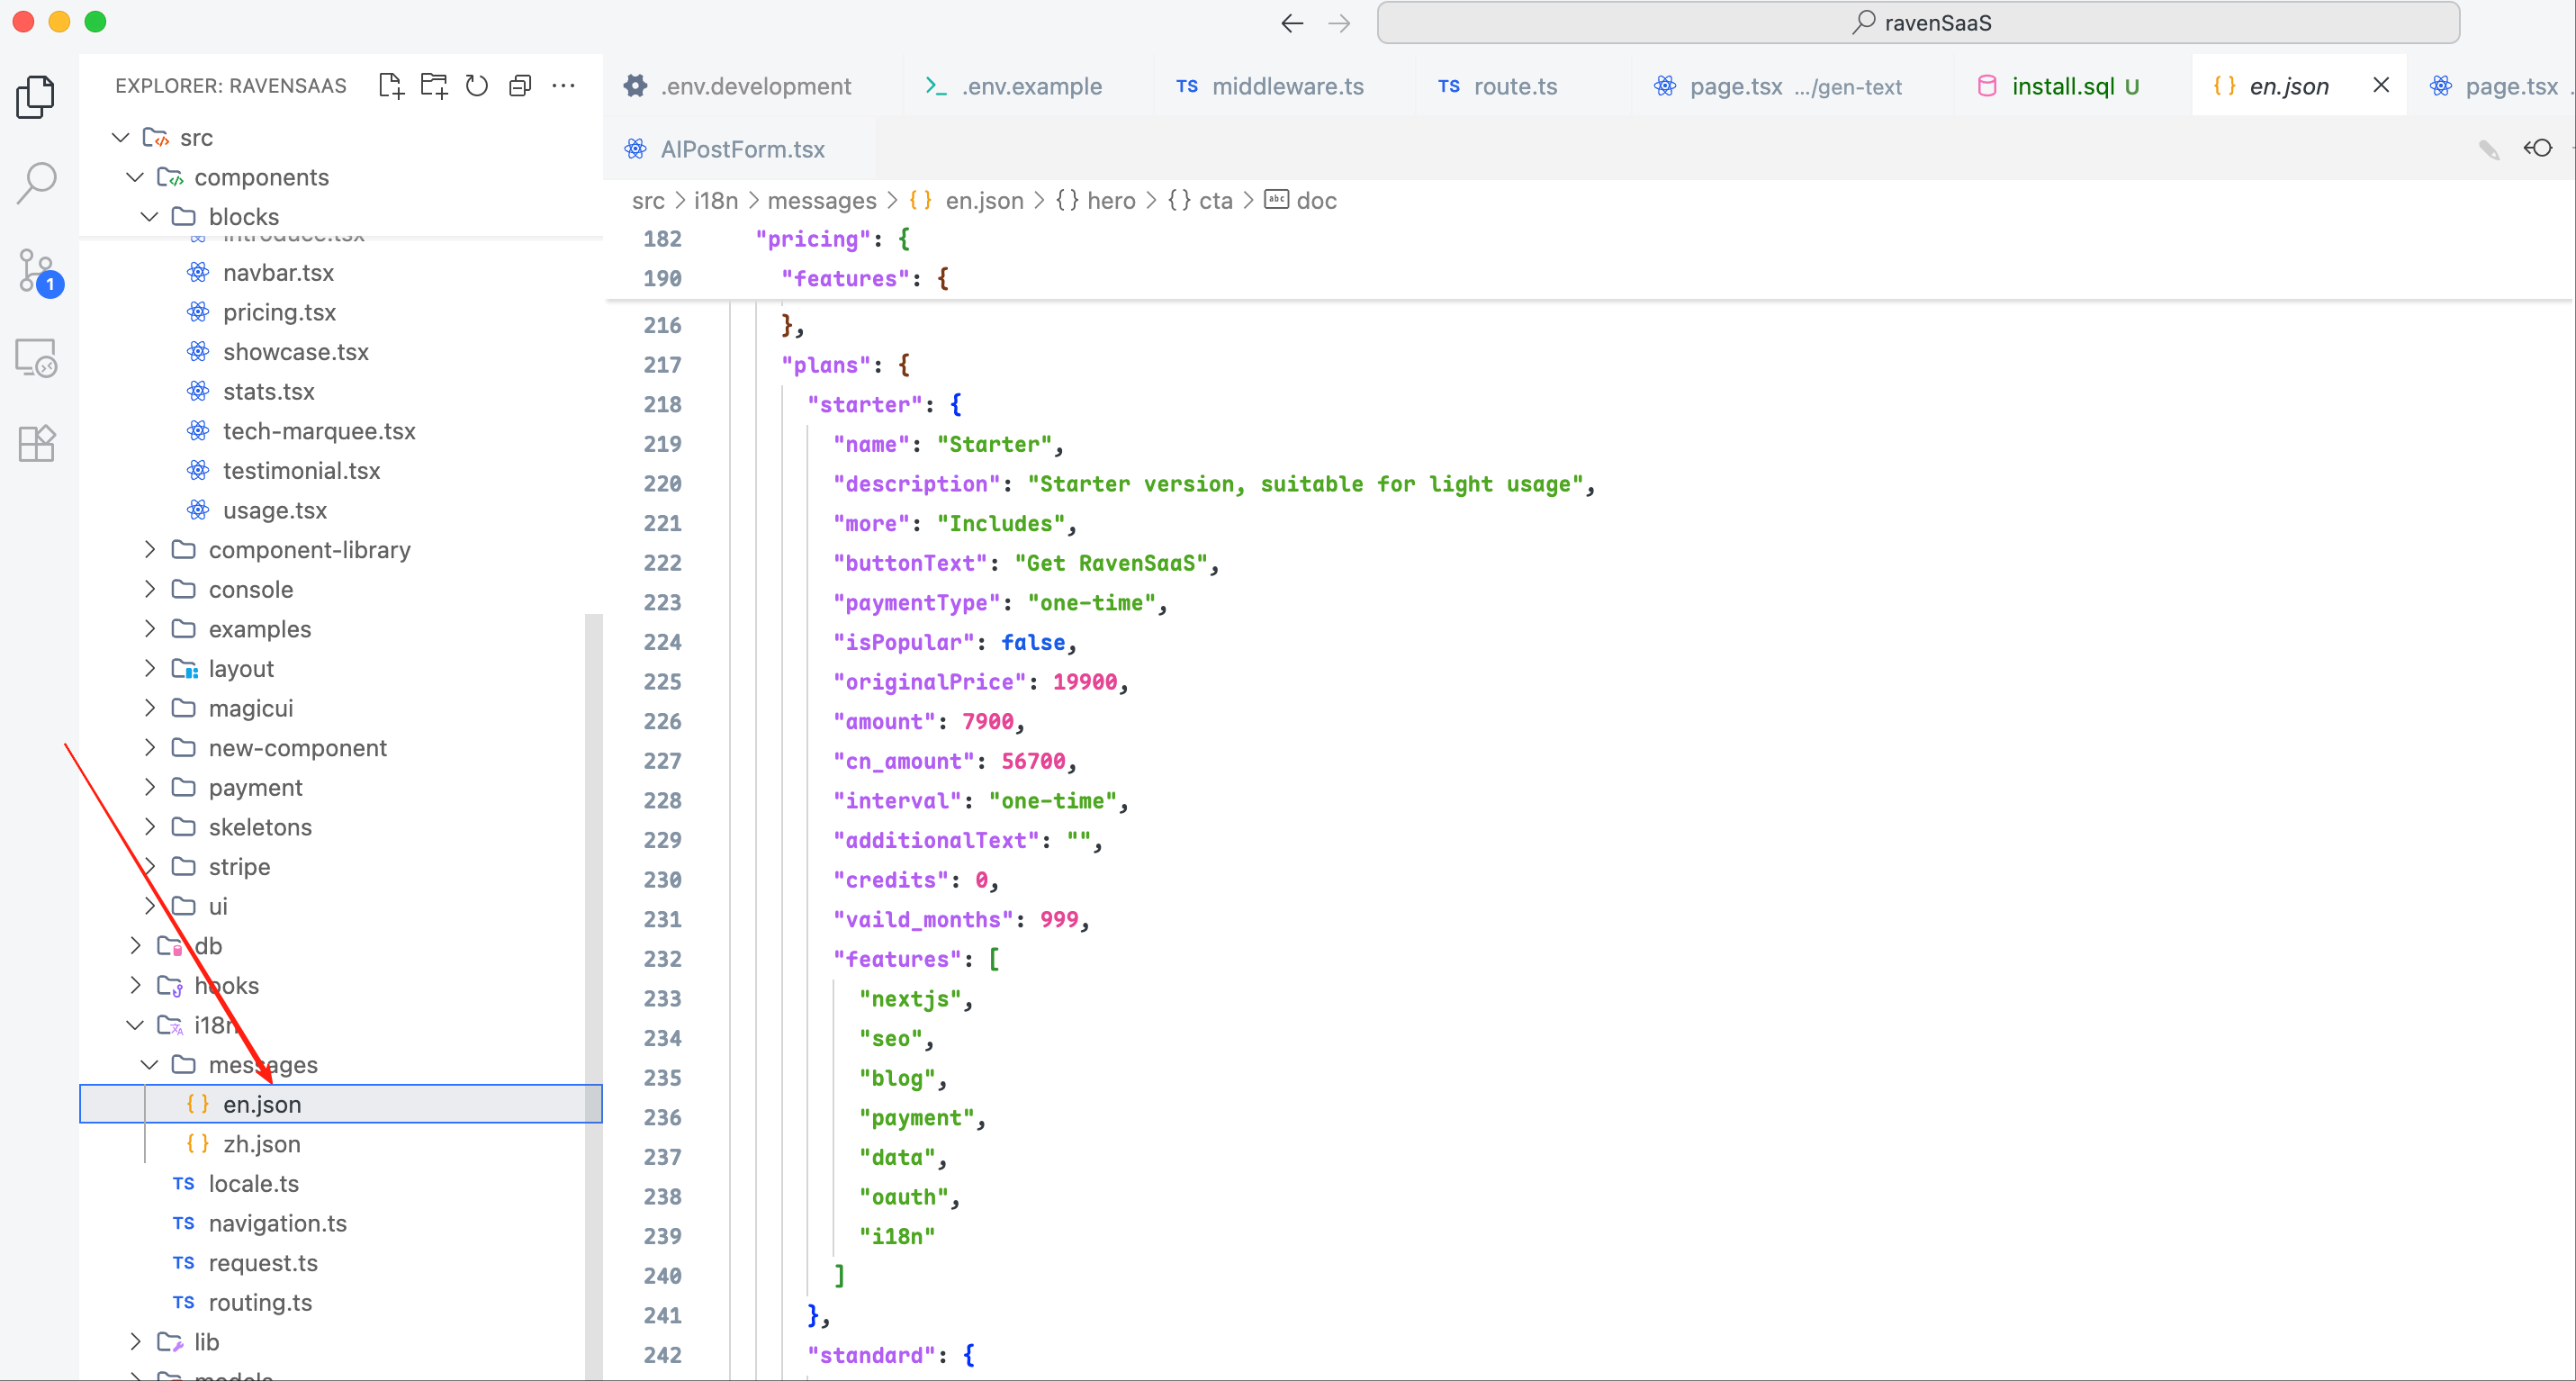
RavenSaaS has a built-in pricing table component (Pricing):src/components/blocks/pricing.tsx, which displays the pricing table through configuration data and supports multi-language by default.
src/i18n/messages/en.jsonYou can modify the pricing table information under the pricing field according to your needs.
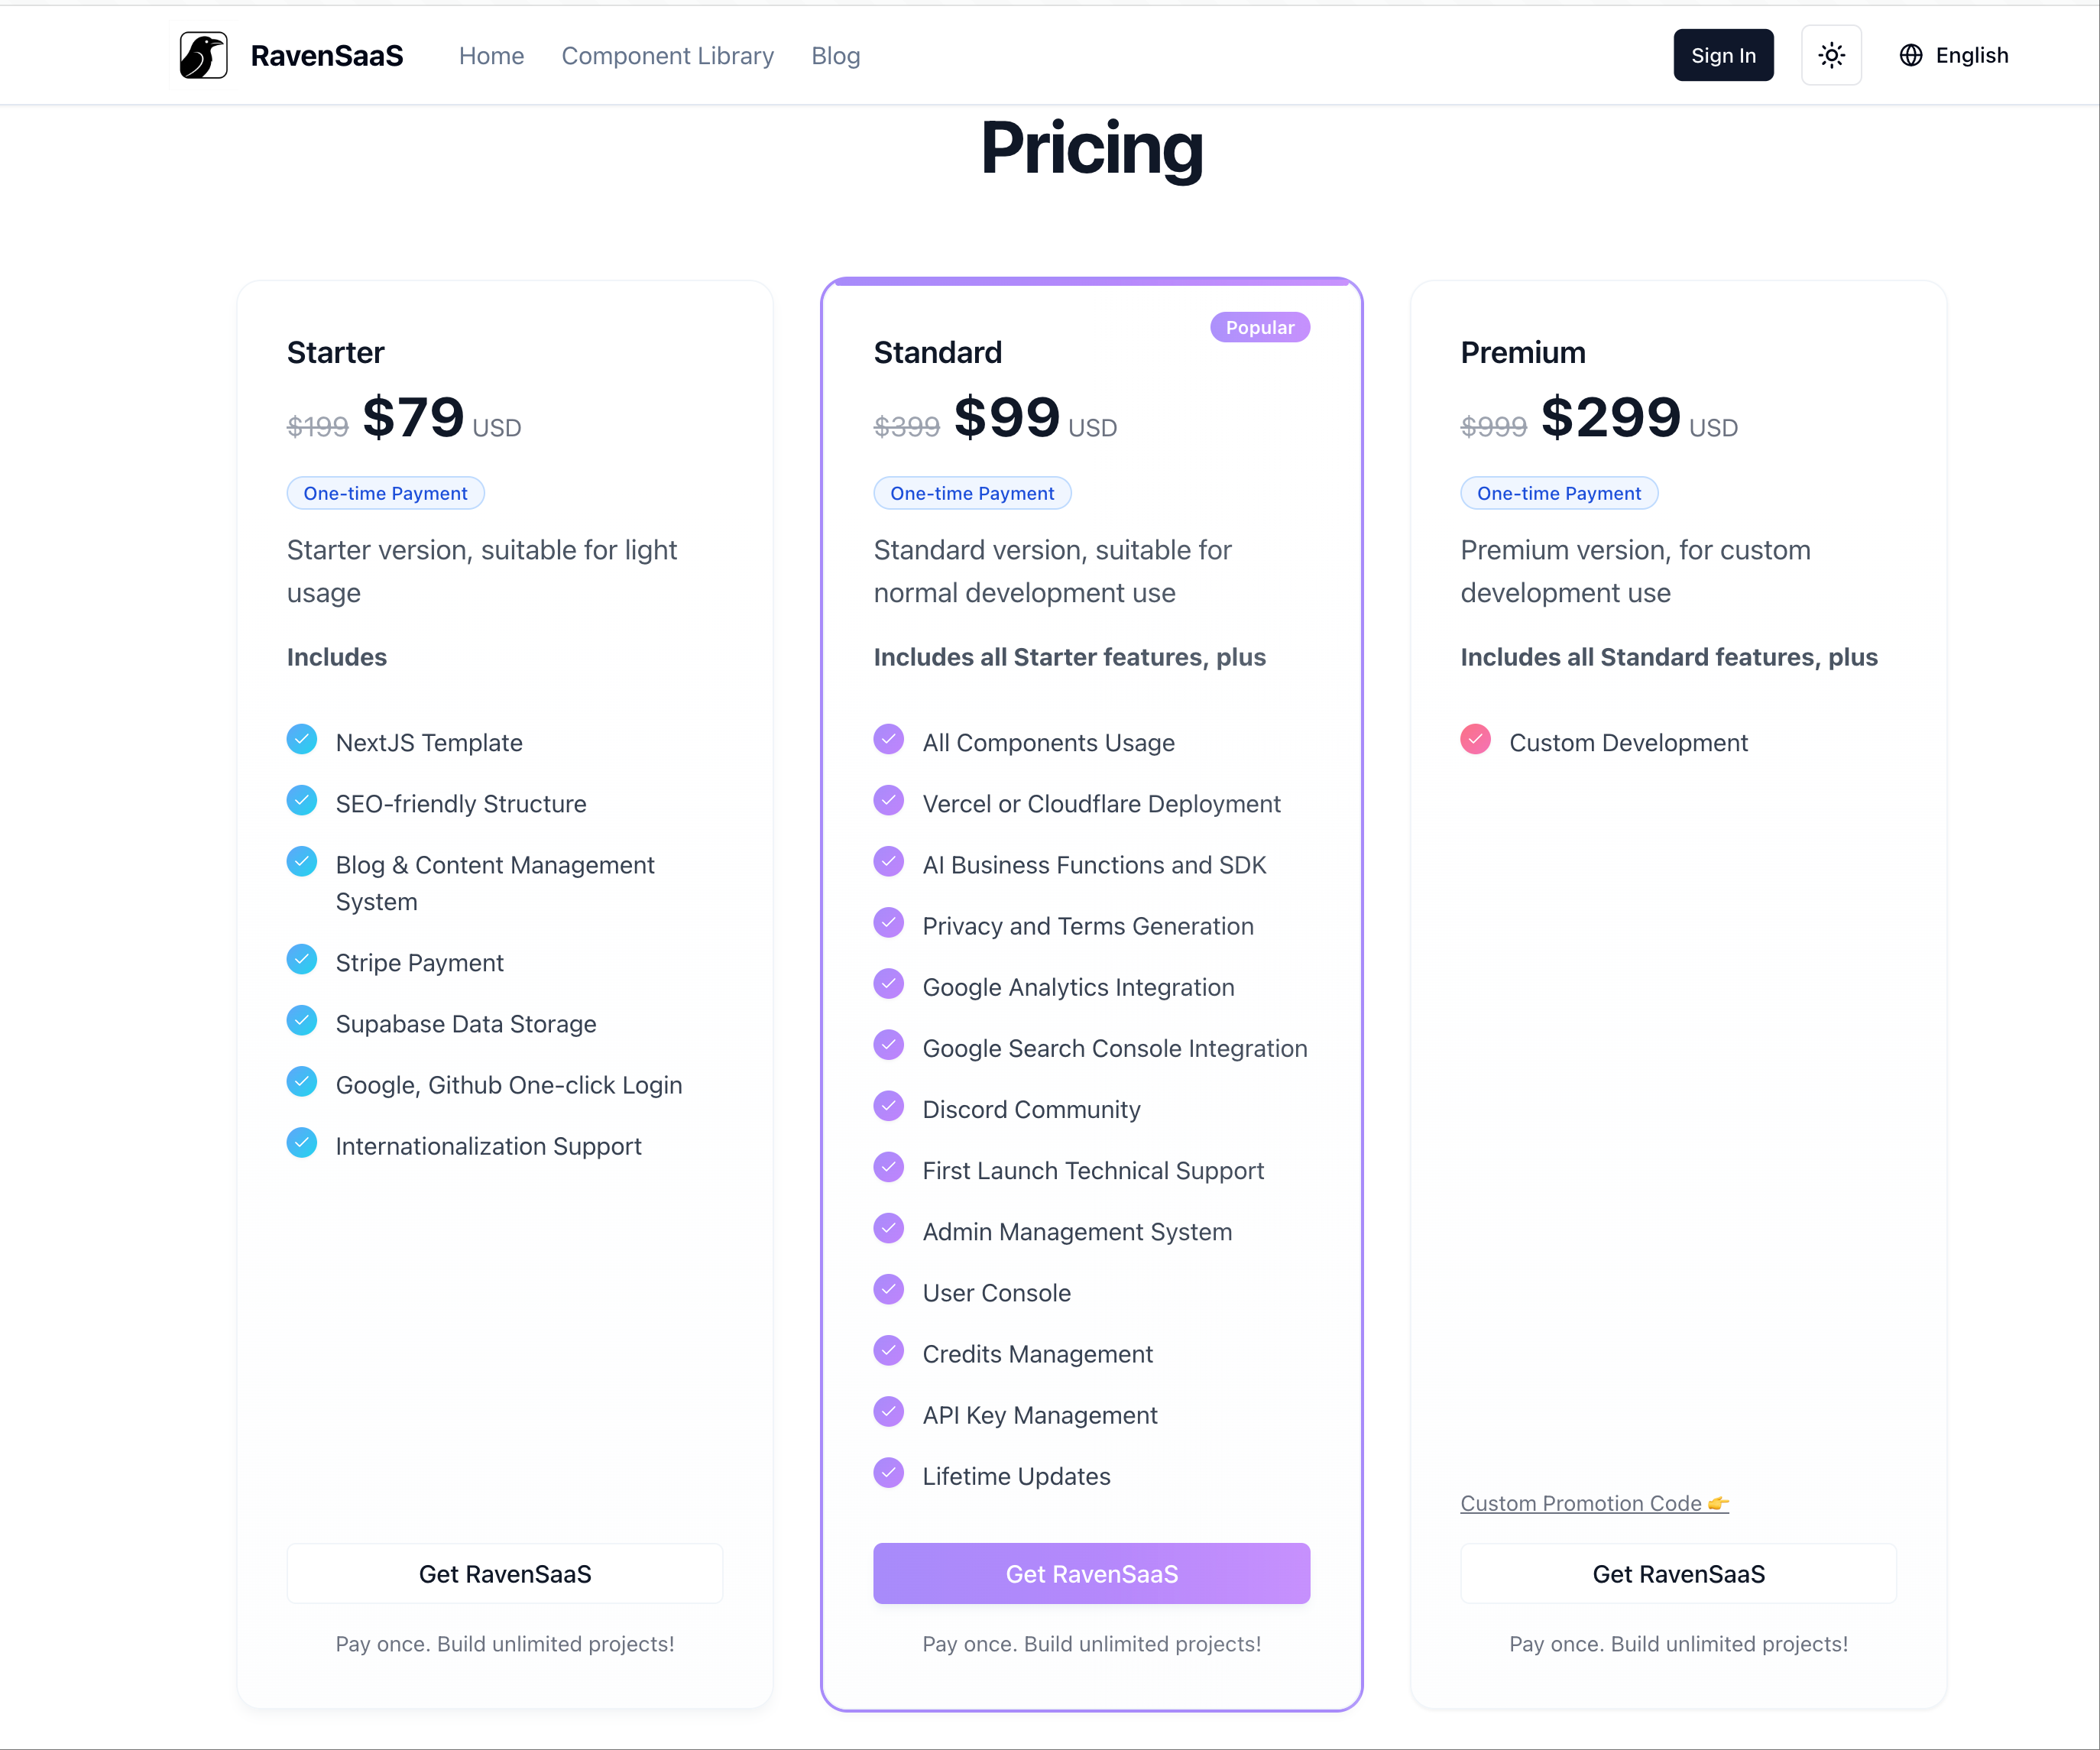
6. Preview Pricing Table
After configuration, open the website homepage to see the configured pricing table.
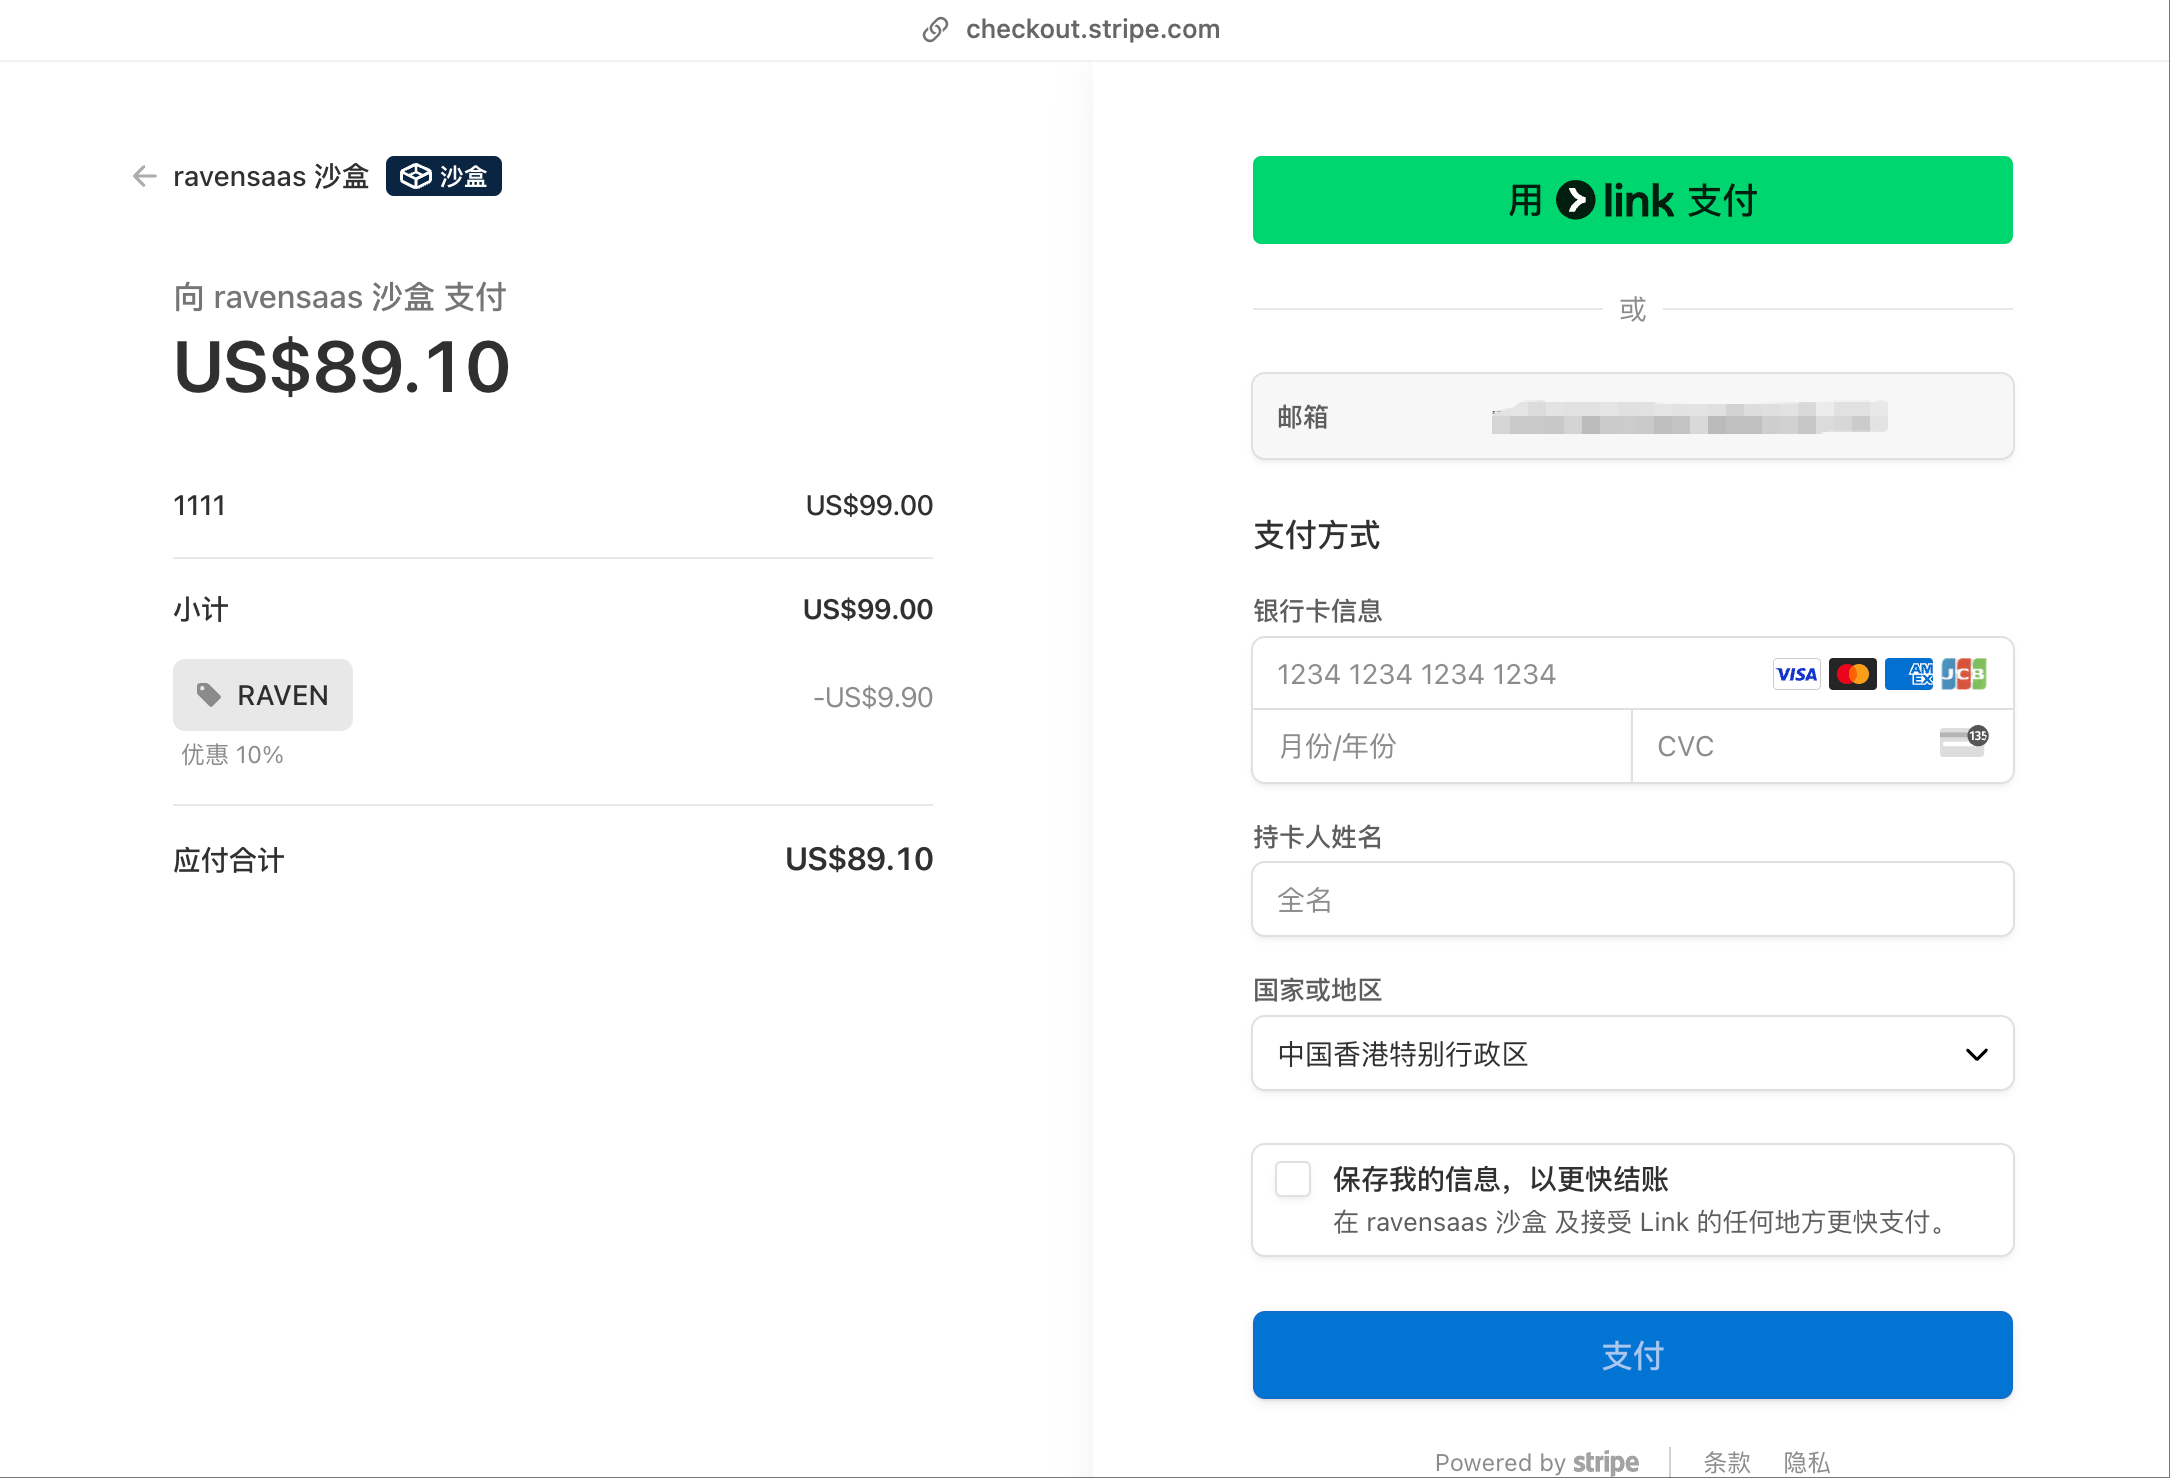
7. Test Payment
Click the order button on the pricing table to jump to the payment console.
If it's a test environment, you can go to the Stripe test cards page, copy a test card number, and fill it into the Stripe payment form for payment testing.
Common Test Card Numbers
• 4242 4242 4242 4242 - Visa card (successful payment)
• 4000 0000 0000 0002 - Card declined
• Expiry date: any future date, CVC: any 3 digits
8. Handle Payment Results
After successful payment, it redirects to the /pay-success/xxx page by default to handle payment callbacks synchronously.
1import Stripe from "stripe";
2import { handleOrderSession } from "@/services/order";
3import { redirect } from "next/navigation";
4
5export default async function ({ params }: { params: Promise<{ session_id: string }> }) {
6  const { session_id } = await params;
7
8  try {
9    const stripe = new Stripe(process.env.STRIPE_PRIVATE_KEY || "");
10    const session = await stripe.checkout.sessions.retrieve(session_id);
11
12    await handleOrderSession(session);
13
14  } catch (e) {
15    const failUrl = process.env.NEXT_PUBLIC_PAY_FAIL_URL || "/";
16    redirect(failUrl);
17  }
18
19  const successUrl = process.env.NEXT_PUBLIC_PAY_SUCCESS_URL || "/my-orders";
20  redirect(successUrl);
21}
After updating the order status, redirect to the NEXT_PUBLIC_PAY_SUCCESS_URL address set in the configuration file. By default, the payment success handling logic only updates the order status and payment information.
You can also modify the logic here to add your own business logic, such as sending emails / notifications / adding credits, etc.
1import { findOrderByOrderNo, updateOrderStatus } from "@/models/order";
2import Stripe from "stripe";
3import { getIsoTimestr } from "@/lib/time";
4
5export async function handleOrderSession(session: Stripe.Checkout.Session) {
6  try {
7    if (
8      !session ||
9      !session.metadata ||
10      !session.metadata.order_no ||
11      session.payment_status !== "paid"
12    ) {
13      throw new Error("invalid session");
14    }
15
16    const order_no = session.metadata.order_no;
17    const paid_email =
18      session.customer_details?.email || session.customer_email || "";
19    const paid_detail = JSON.stringify(session);
20
21    const order = await findOrderByOrderNo(order_no);
22    if (!order || order.status !== "pending") {
23      throw new Error("invalid order");
24    }
25
26    const paid_at = getIsoTimestr();
27    await updateOrderStatus(order_no, "paid", paid_at, paid_email, paid_detail);
28
29    console.log(
30      "handle order session successed: ",
31      order_no,
32      paid_at,
33      paid_email,
34      paid_detail
35    );
36  } catch (e) {
37    console.log("handle order session failed: ", e);
38    throw e;
39  }
40}
Payment Result Async Notification
Synchronous payment result processing is unreliable. Users might accidentally close the browser page during the redirect process, preventing the order status and payment information update logic from executing. It's recommended to configure asynchronous payment notifications before going live.
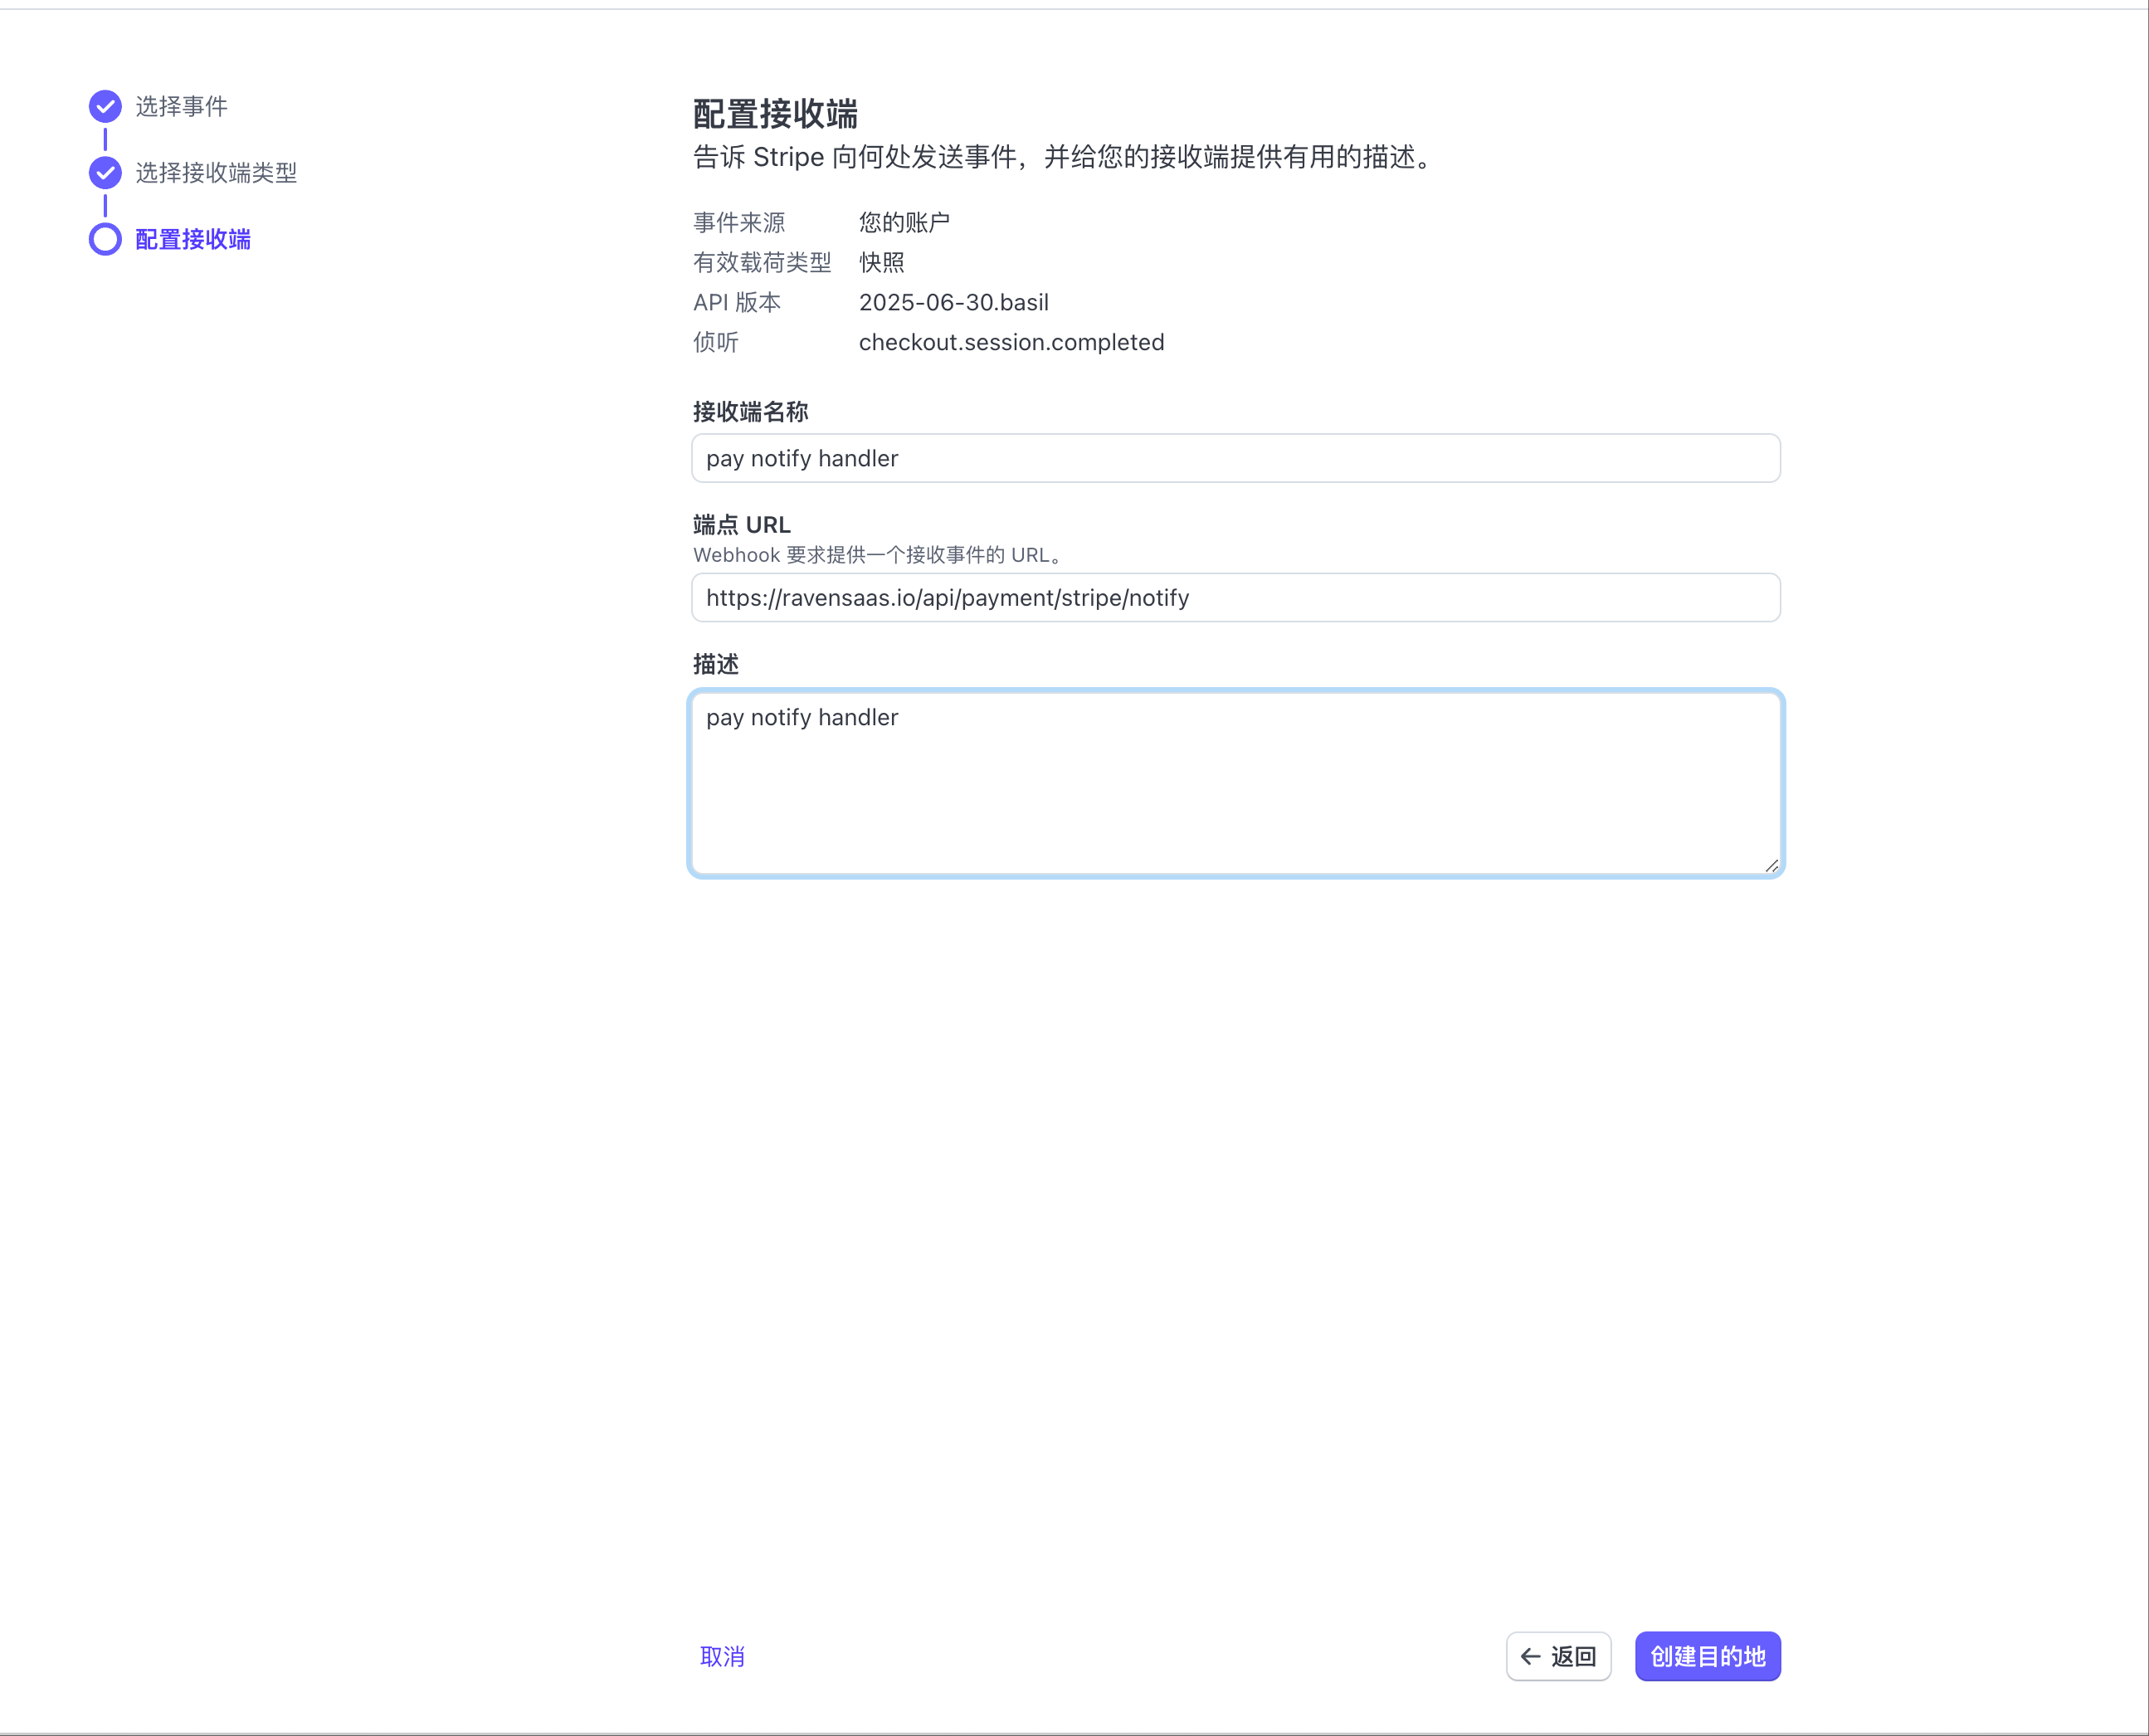
1. Configure Webhook in Stripe Backend
Refer to Stripe Webhook Configuration Documentationto configure Webhook.
For local debugging, listen to events through stripe cli:
1stripe listen --events checkout.session.completed,invoice.payment_succeeded --forward-to localhost:3000/api/payment/stripe/notifyForward Stripe callback events after user payment to the local RavenSaaS service's /api/payment/stripe/notify endpoint.
2. Modify Configuration File
After successful local listening in the previous step, you'll get a webhook signing secret. Fill this parameter value into the RavenSaaS project configuration file:
1STRIPE_WEBHOOK_SECRET = "whsec_cexxx"
3. Handle Payment Callback Results
You can modify the default payment callback handling logic according to your actual needs:
1import Stripe from "stripe";
2import { respOk } from "@/lib/response";
3
4export const runtime = "edge";
5
6export async function POST(req: Request) {
7  try {
8    const stripePrivateKey = process.env.STRIPE_PRIVATE_KEY;
9    const stripeWebhookSecret = process.env.STRIPE_WEBHOOK_SECRET;
10
11    if (!stripePrivateKey || !stripeWebhookSecret) {
12      throw new Error("invalid stripe config");
13    }
14
15    const stripe = new Stripe(stripePrivateKey);
16
17    const sign = req.headers.get("stripe-signature") as string;
18    const body = await req.text();
19    if (!sign || !body) {
20      throw new Error("invalid notify data");
21    }
22
23    const event = await stripe.webhooks.constructEventAsync(
24      body,
25      sign,
26      stripeWebhookSecret
27    );
28
29    console.log("stripe notify event: ", event);
30
31    switch (event.type) {
32      case "checkout.session.completed": {
33        const session = event.data.object;
34
35        const handleResponse = await fetch(`${process.env.NEXT_PUBLIC_WEB_URL}/api/payment/stripe/handle-session`, {
36          method: 'POST',
37          headers: {
38            'Content-Type': 'application/json',
39          },
40          body: JSON.stringify({ session }),
41        });
42
43        if (!handleResponse.ok) {
44          throw new Error(`Failed to handle session: ${handleResponse.statusText}`);
45        }
46
47        break;
48      }
49
50      default:
51        console.log("not handle event: ", event.type);
52    }
53
54    return respOk();
55  } catch (e: any) {
56    console.log("stripe notify failed: ", e);
57    return Response.json(
58      { error: `handle stripe notify failed: ${e.message}` },
59      { status: 500 }
60    );
61  }
62}
Before going live in production, you need to configure payment callback Webhook in the Stripe production environment.
Payment Customization
Subscription Payment
RavenSaaS supports three payment plans by default:
- One-time payment: one-time
- Monthly subscription: month
- Annual subscription: year
You just need to modify the pricing table configuration and set the paymentType field for each pricing plan to one of the above three values.
At the same time, modify the price amount / credits / valid_months and other fields as needed.
Example: For monthly subscription billing, monthly payment of $99, 30 credits after purchase, valid for 1 month, the core pricing table configuration information is:
1{
2  "interval": "month",
3  "amount": 9900,
4  "credits": 30,
5  "valid_months": 1
6}
Best Practices
RavenSaaS cannot adapt to all payment scenarios. Please modify according to your actual business needs:
- Pricing table component: src/components/blocks/pricing.tsx
- Payment order API: src/app/api/checkout/route.ts
- Payment callback logic: src/app/api/payment/stripe/notify/route.ts
Reference
Stripe Payment Documentation
View Docs →Last updated on January 5, 2025